Procedure 02
Floor screed tolerances
Most tiling failures start under the tiles. A screed laid 15 mm thinner than the drawing, tiled at 85 percent relative humidity, or left 9 mm out under a 2 m straight edge carries the fault into every finish above, so a screed gets checked three times: during the pour, during drying, and on the day before tiling.
01.How thick must a floor screed be on a bonded, unbonded or floating construction?
Minimum screed thickness follows the way the screed sits on the slab: sand and cement bonded to concrete needs 25 mm to 40 mm, the same mix unbonded on a membrane needs 50 mm, and the same mix floating on compressible insulation needs 65 mm under domestic loading and 75 mm under heavy loading.
Measure thickness during the pour with a depth probe pushed to the substrate on a 3 m grid, and write each probe reading against a grid reference on the pour sheet. A probe hole in wet screed closes in seconds and costs nothing. A core drilled through a cured screed two weeks later costs a repair, a fresh patch and a further drying period of 7 to 14 days.
Table 1. Minimum screed thickness by construction type
| Screed type and loading | Bonded to the slab (mm) | Unbonded on a membrane (mm) | Floating on insulation (mm) | Measured by |
|---|---|---|---|---|
| Sand and cement, domestic loading | 25 to 40 | 50 | 65 | Depth probe to the substrate, 3 m grid, during the pour |
| Sand and cement, heavy or commercial loading | 40 | 50 | 75 | Depth probe to the substrate, 3 m grid, during the pour |
| Liquid anhydrite, domestic loading | 25 | 30 | 35 | Dipstick against a datum peg set before the pour |
| Any screed over heating pipes, cover above the pipe crown | 30 | 30 | 30 | Depth probe alongside a pipe run, before the pipe is buried |
Depths are common minimums used on fit out work, stated here without reference to a standard clause. A structural engineer or the screed supplier can raise any figure for a specific loading, and the raised figure governs.
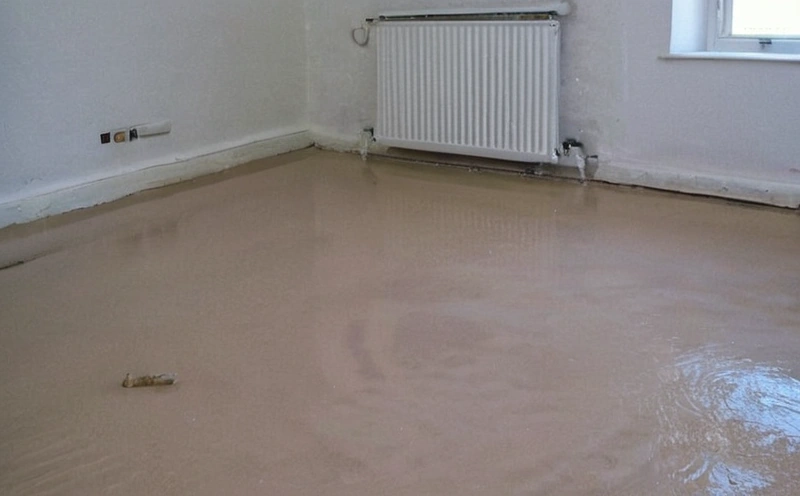
02.What is the difference between curing a screed and drying a screed?
Curing controls screed strength and runs first: polythene stays over a sand and cement screed for 7 days, and foot traffic stays off for 24 to 48 hours. Drying controls screed moisture and starts once the polythene comes off, at roughly 1 mm per day for the first 50 mm of screed depth.
Beyond 50 mm of depth, sand and cement screed dries at about 2 days per millimetre. A 65 mm floating screed therefore needs 50 days for the first 50 mm plus 30 days for the remaining 15 mm, which totals roughly 80 days before a hygrometer reading passes. Liquid anhydrite dries at about 1 mm per day up to 40 mm and slows to 0.5 mm per day beyond 40 mm, and anhydrite also needs the surface laitance sanded off before any adhesive touches the screed.
Table 2. Curing and drying schedule by screed type and depth
| Screed type and depth | Protected cure under polythene (days) | Foot traffic allowed after (hours) | Drying rate (mm per day) | Days to a passing hygrometer reading at 20 C and 50 percent RH (days) |
|---|---|---|---|---|
| Sand and cement, 50 mm bonded | 7 | 24 to 48 | 1.0 to 50 mm | 50 |
| Sand and cement, 65 mm floating | 7 | 24 to 48 | 1.0 to 50 mm, then 0.5 | 80 |
| Sand and cement, 75 mm floating | 7 | 24 to 48 | 1.0 to 50 mm, then 0.5 | 100 |
| Liquid anhydrite, 40 mm | 0, protect from water for 48 hours | 24 to 48 | 1.0 to 40 mm | 40 |
| Liquid anhydrite, 50 mm | 0, protect from water for 48 hours | 24 to 48 | 1.0 to 40 mm, then 0.5 | 60 |
Days in the last column assume 20 degrees Celsius, air moving across the surface, and room relative humidity below 65 percent. A closed room at 11 degrees Celsius doubles every figure in that column.
Heating pipes change the sequence and add a commissioning record. Cure the screed for 7 days, start the heating with a flow temperature of 25 degrees Celsius, raise the flow by 5 degrees per day to the design maximum, hold the design maximum for 3 days, then drop the flow back to 15 to 18 degrees and switch the system off 48 hours before tiling. Commissioning a typical domestic system therefore occupies 10 to 14 days. Record the start date, the daily flow temperatures and the hold dates, because the tiler asks for the commissioning certificate before starting and the tile supplier asks for the same certificate again if a joint fails in year two.
Log drying conditions daily rather than counting drying days on a calendar. A written record of room temperature and relative humidity turns a delay into evidence: 14 days at 11 degrees Celsius with the windows shut explains why a 65 mm screed still reads 82 percent RH in week ten. A thermohygrometer left on the floor and read at the same hour every morning produces 80 dated rows over an 80 day drying period, and those 80 rows settle the later argument about who owns the lost fortnight.
03.How is screed moisture measured before the floor finish goes down?
Screed moisture is measured with a hygrometer box sealed to the surface for 72 hours, and the reading counts only once two readings taken 4 hours apart agree within 1 percent RH. A carbide bomb test gives a faster answer from a sample drilled out of the middle third of the screed depth, never from the surface.
Position the boxes where the screed dries slowest. Take one reading in the middle of the room, one reading within 300 mm of every external wall, and one further reading per 200 square metres of floor. Seal each box to the screed with mastic tape around the full rim, because a box leaking at one corner reads 6 to 10 percent RH low and passes a wet floor.
Table 3. Moisture limits before laying each floor finish
| Floor finish | Hygrometer limit, sand and cement (percent RH) | Carbide limit, sand and cement (percent by weight) | Hygrometer limit, anhydrite (percent RH) | Sample position for the carbide test |
|---|---|---|---|---|
| Ceramic or porcelain tile on cement adhesive | 75 | 2.0 | 75 | Middle third of the screed depth |
| Natural stone, light colour | 70 | 1.5 | 70 | Middle third of the screed depth |
| Vinyl and resilient sheet | 75 | 2.0 | 75 | Middle third of the screed depth |
| Engineered wood, fully glued | 65 | 1.5 | 65 | Middle third of the screed depth |
| Solid wood, fully glued | 65 | 1.0 | 65 | Middle third of the screed depth |
Adhesive manufacturers publish their own limits in the product data sheet. The lower of the two figures applies, and the manufacturer figure decides any dispute about a warranty claim.
04.Which surface regularity grade suits each floor finish?
Surface regularity grades SR1, SR2 and SR3 each name a maximum gap under a 2 m straight edge: 3 mm for SR1, 5 mm for SR2 and 10 mm for SR3. The floor finish chooses the grade, because a 10 mm dip disappears under carpet and cracks four tiles under 600 mm porcelain within a year of use.
Write the grade into the screed subcontract before the pour rather than into a rejection notice afterwards. Correcting a floor from SR3 to SR1 needs a levelling compound at 3 mm to 10 mm of build up, which adds material cost across the whole room area plus a further 24 to 48 hours of drying before the tiler starts.
Table 4. Surface regularity grade by floor finish
| Grade | Maximum gap under a 2 m straight edge (mm) | Finishes the grade suits | Typical correction and added drying time (hours) |
|---|---|---|---|
| SR1 | 3 | Thin vinyl, resin, porcelain tiles over 600 mm on any side | Levelling compound 3 to 10 mm, 24 to 48 |
| SR2 | 5 | Ceramic tile under 600 mm, engineered wood, general fit out | Local patching under 5 mm, 12 to 24 |
| SR3 | 10 | Carpet, raised access floor, storage and plant areas | None required for the listed finishes |
Grades are measured as the largest gap under a 2 m straight edge laid anywhere on the floor, with the edge resting on two high points and a feeler gauge in the hollow.
Reject the screed when any line applies
- Depth probe reads below the specified thickness at any point on the 3 m grid
- Cracks measure wider than 0.5 mm on a gauge card, or cross a day joint
- Tapping a bonded screed gives a hollow tone over an area larger than 0.25 square metres
- Edges curl by more than 2 mm at a day joint or at a room perimeter
- Surface dusts under a coin scratch, or fails the specified screed strength test
- No compressible perimeter strip of at least 8 mm appears at walls around a floating screed
- Hygrometer reads above the limit for the specified finish after 72 hours sealed
- Heating commissioning record is missing, or shows no 3 day hold at the design maximum
05.What gets checked on the floor the day before tiling?
The day before tiling repeats three measurements in front of the tiler: a 2 m straight edge run across the room in both directions plus one diagonal, a final hygrometer reading against the 75 percent RH limit for ceramic tile, and a tap test with a nylon rod across every bay of a bonded screed.
Mark every failing spot with a chalk circle, write the measured gap inside the circle, and photograph the chalk with a marker card in frame. Write both names on the moisture sheet on the day of the reading. A tiler who signed the 74 percent RH reading cannot blame the screed when a joint fails in month eight, and a supervisor who skipped the reading owns that failure alone.
Screed deviation carried into the tiles becomes lippage, measured against the limits on the tiling checks page, and every chalk circle belongs in the numbered register described on the punch list page.